
Why iPhone Back Glass Repair Costs More Than You Think in NZ
At EziRepair Auckland & Christchurch, we specialise in precise iPhone back glass replacement.
Below is the exact process customers pay for.
Step-by-Step: The Real Repair Process
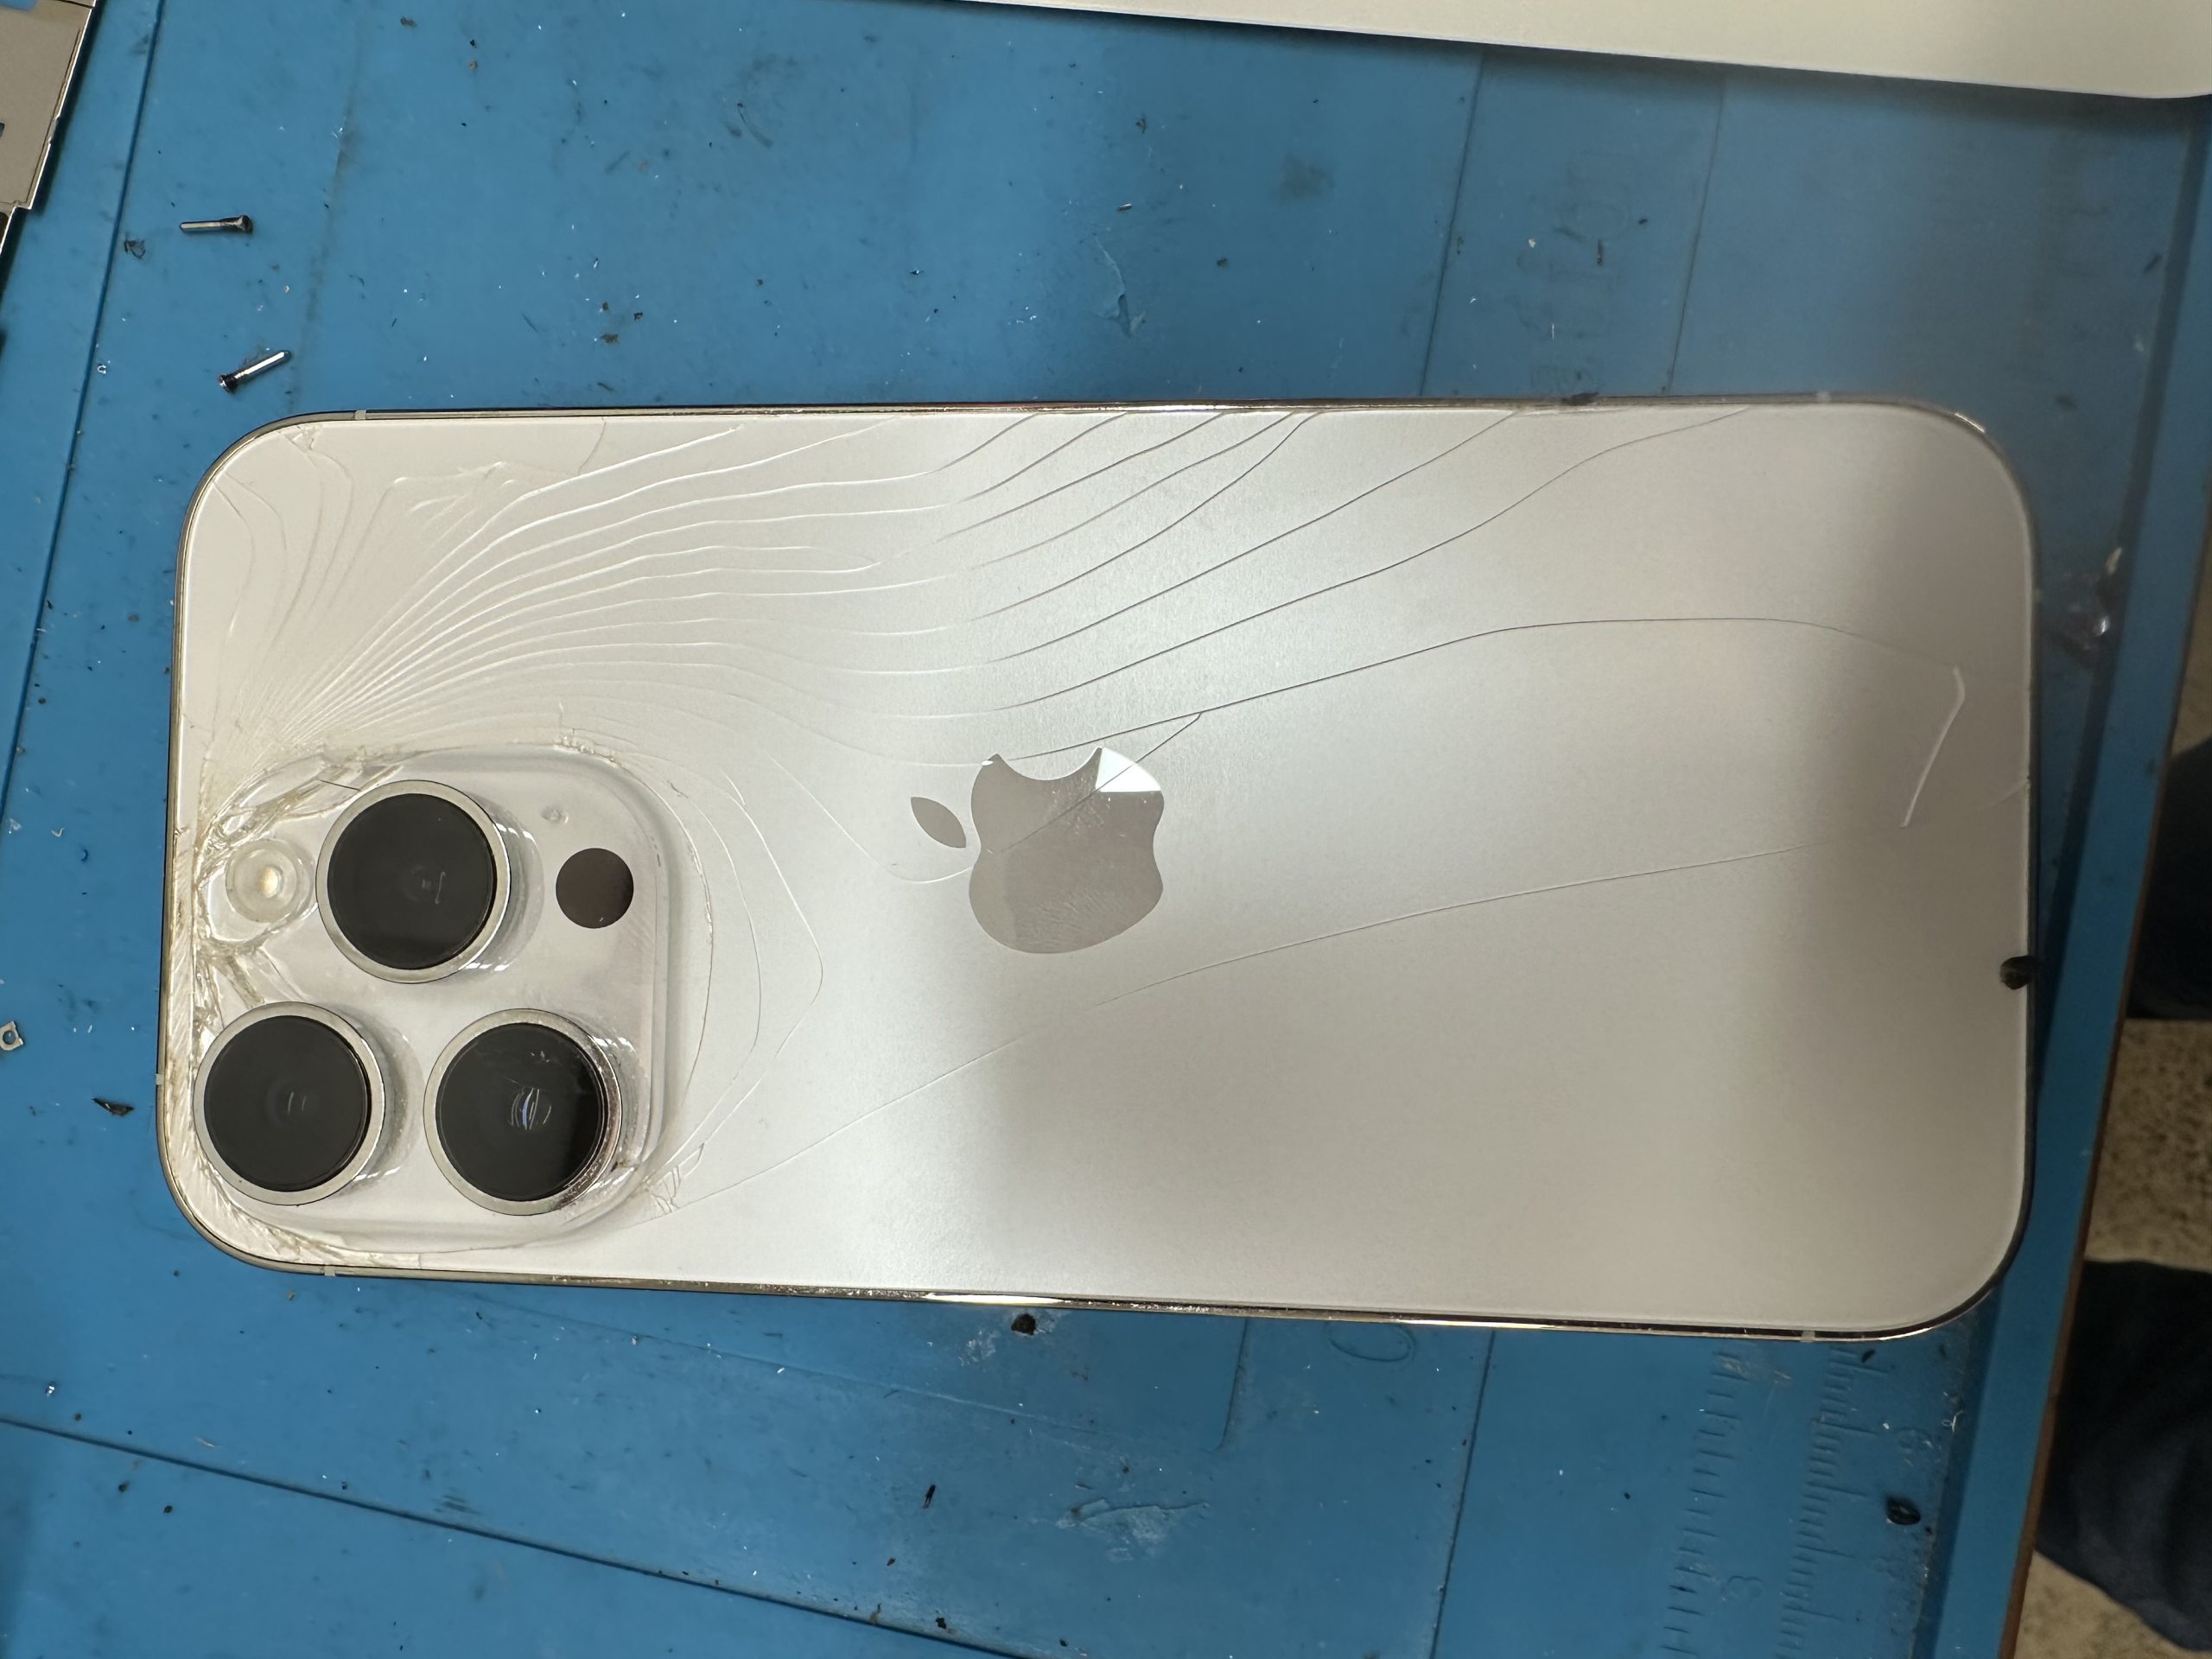
- Problem Check: Inspect the cracked back glass and assess the damage.
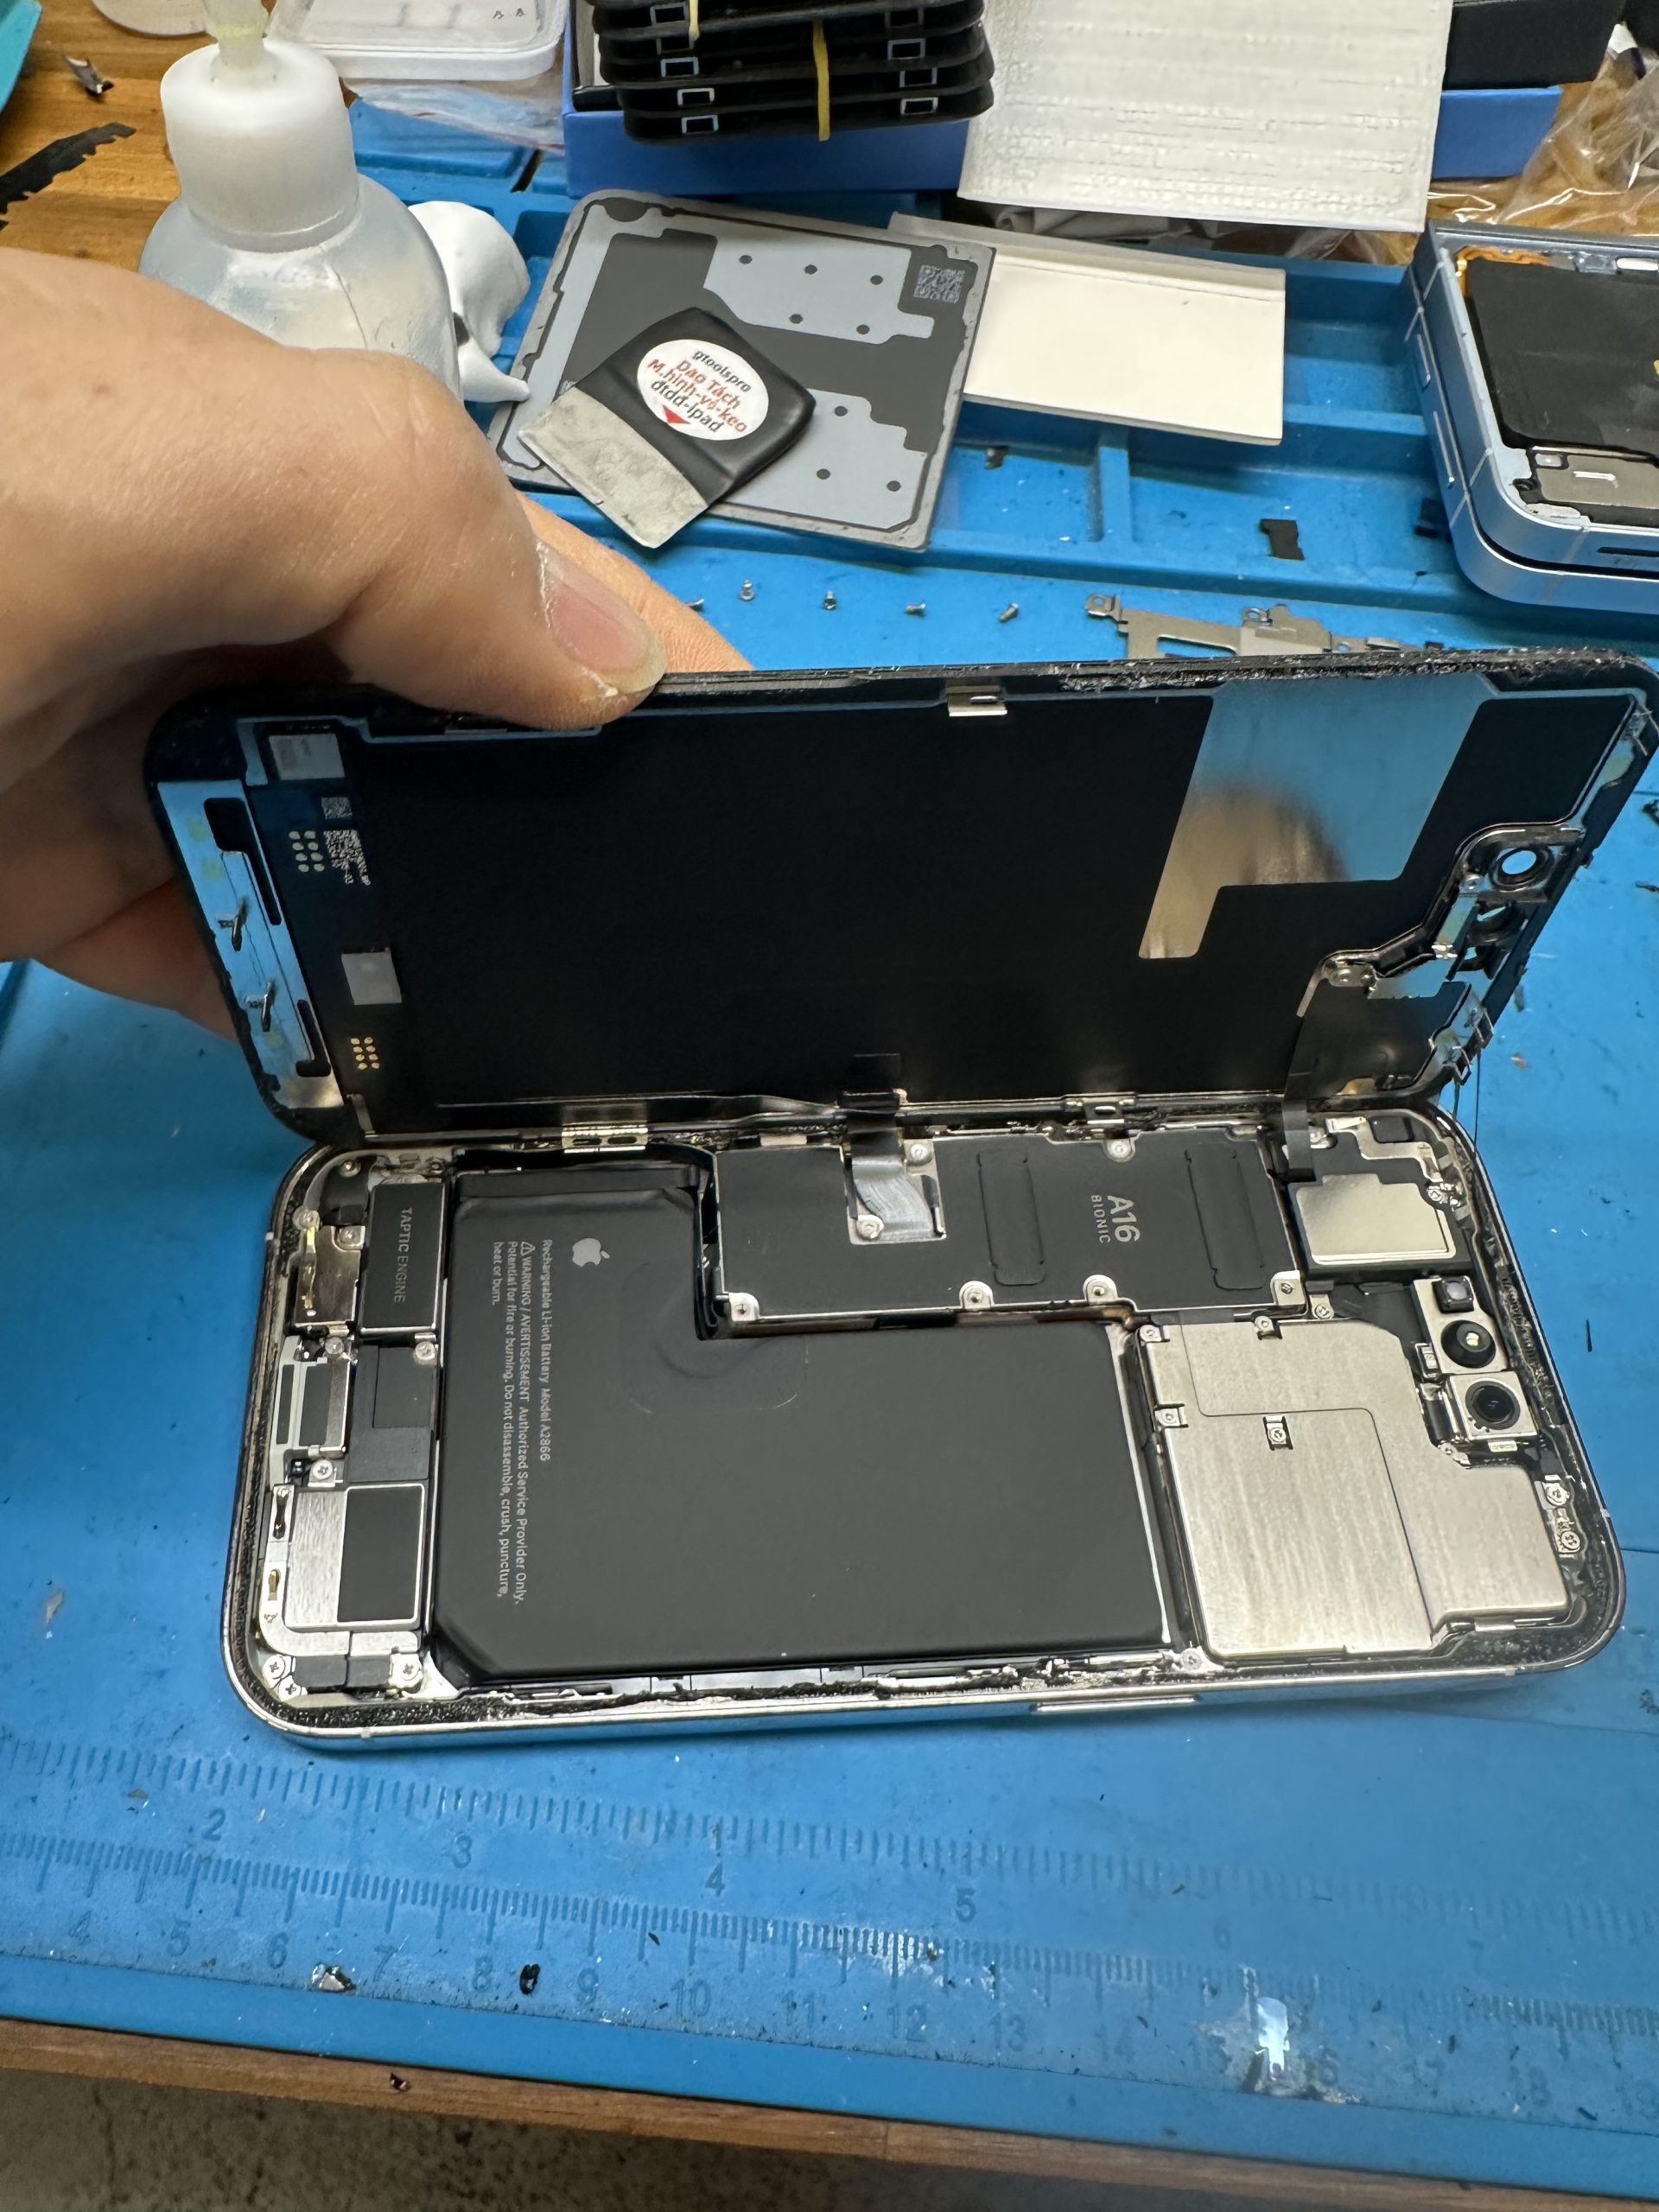
- Opening: Open the screen to access internal components.
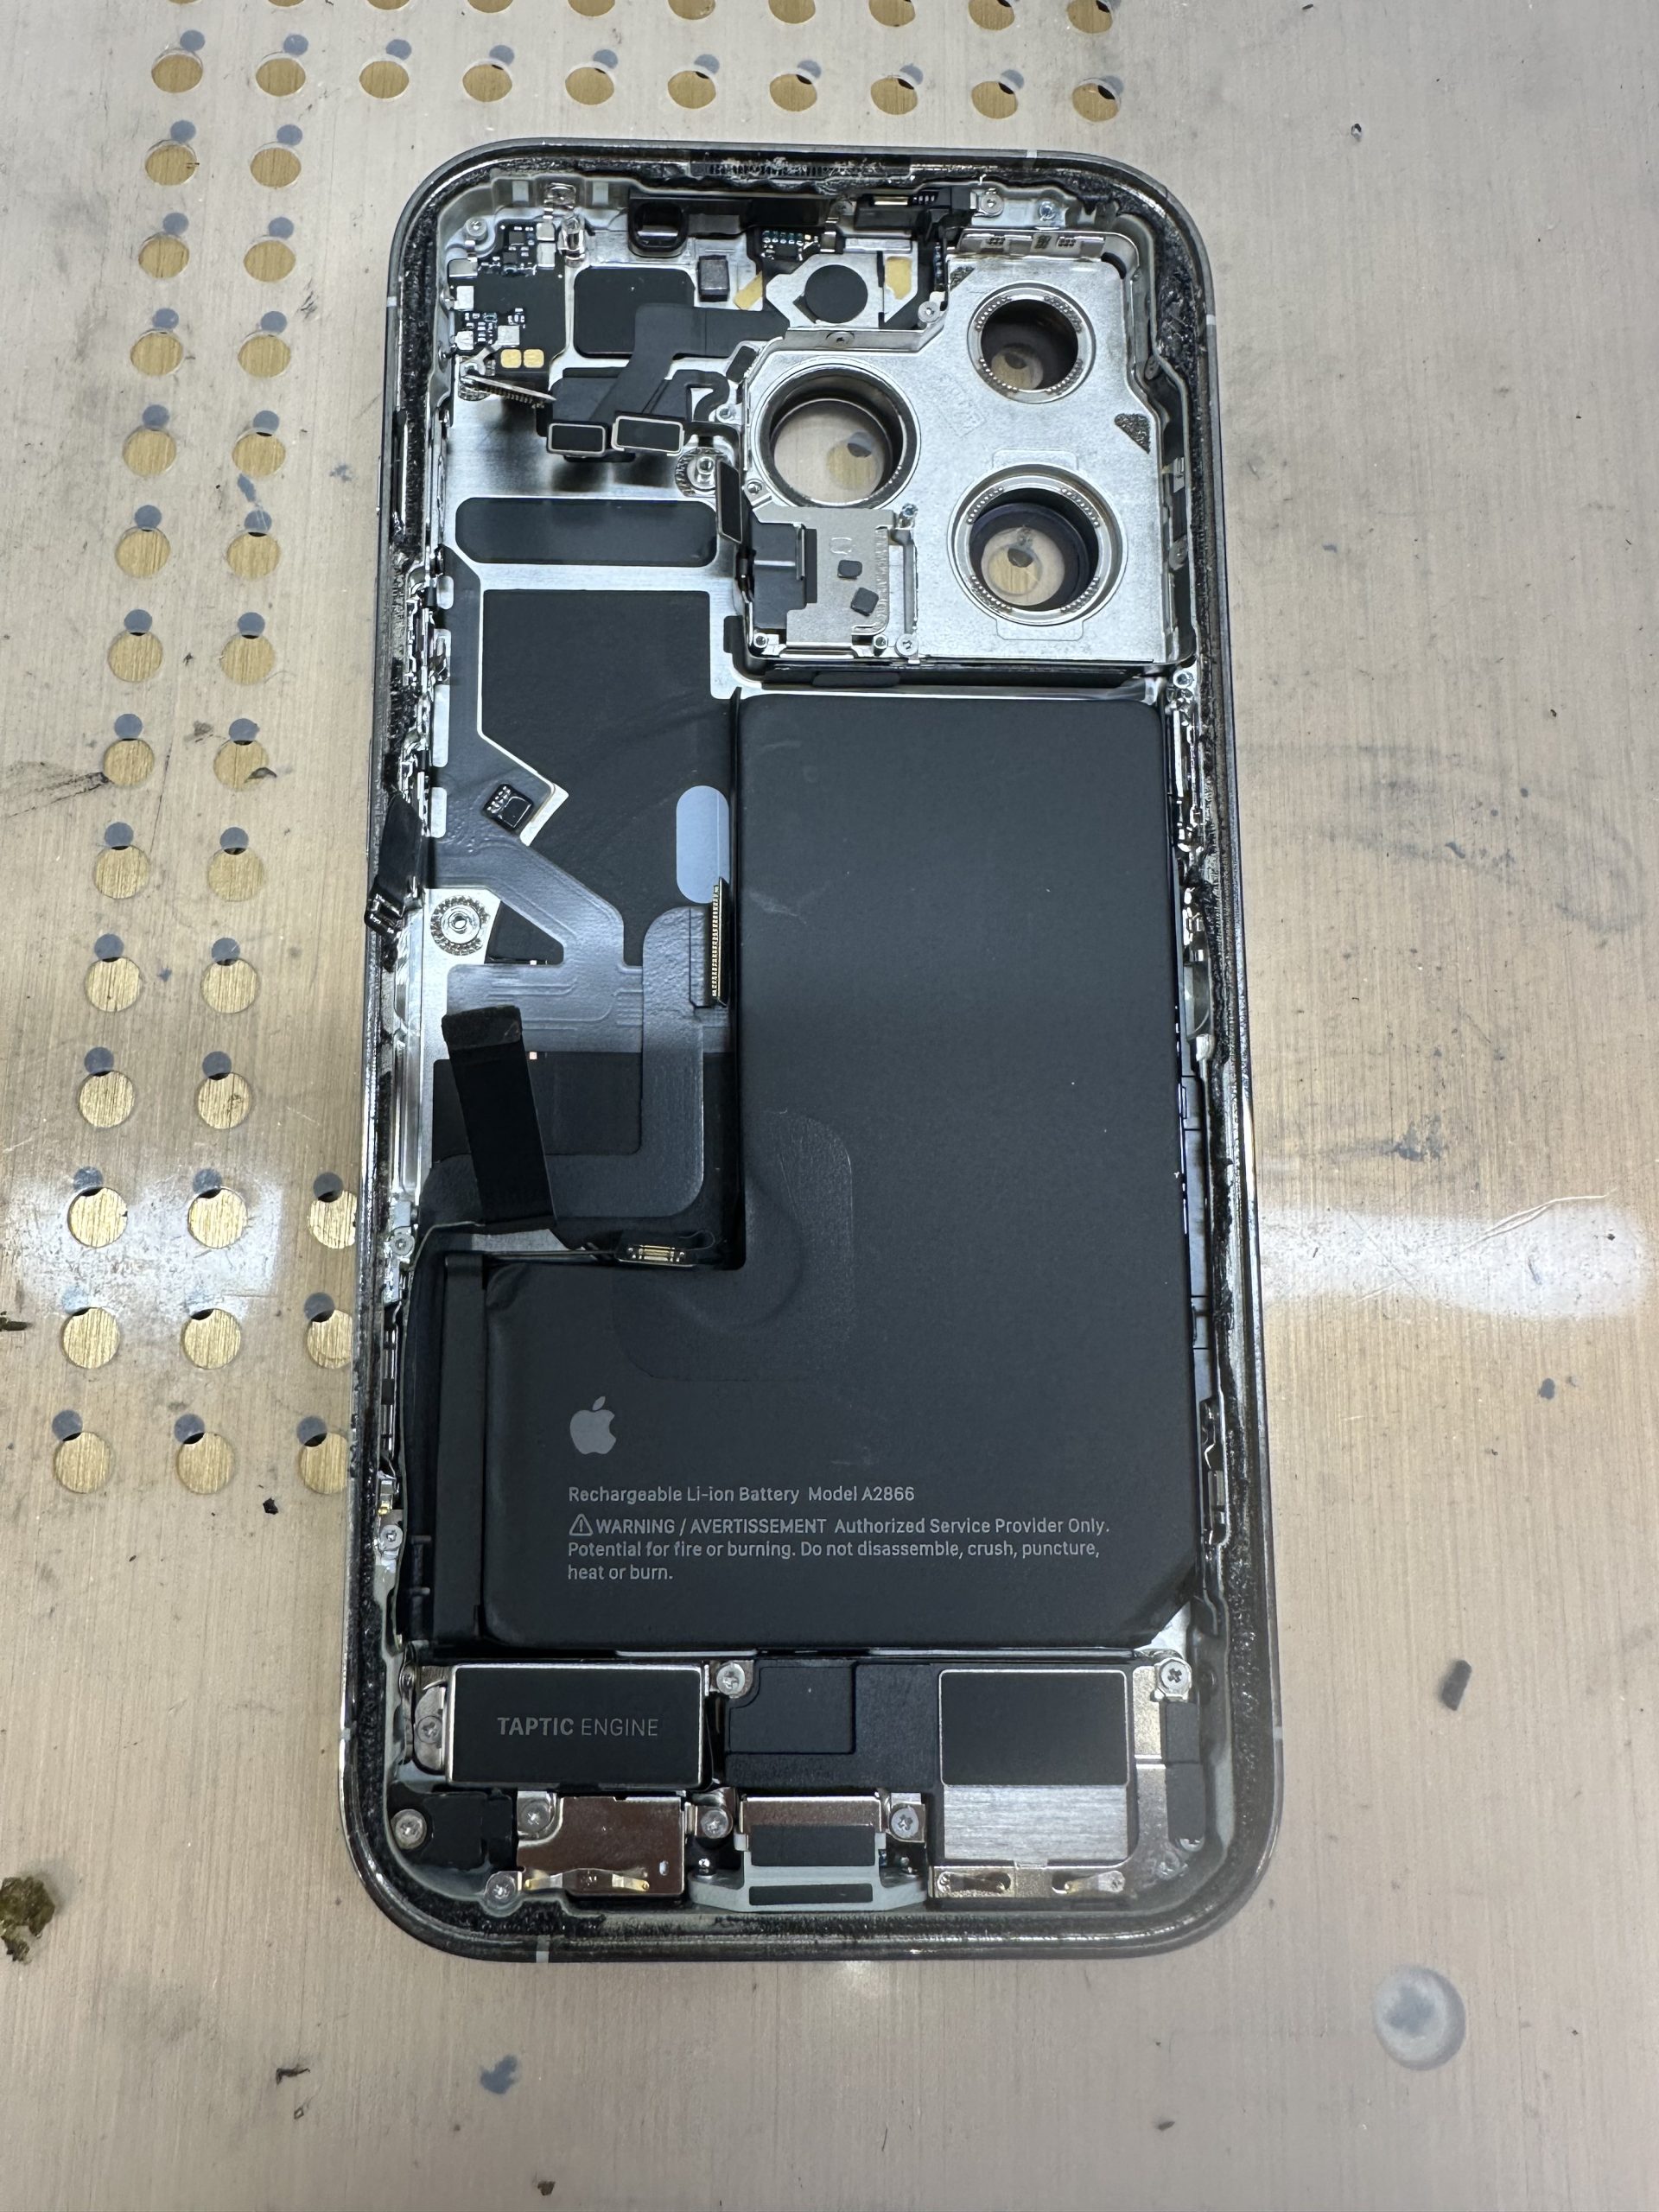
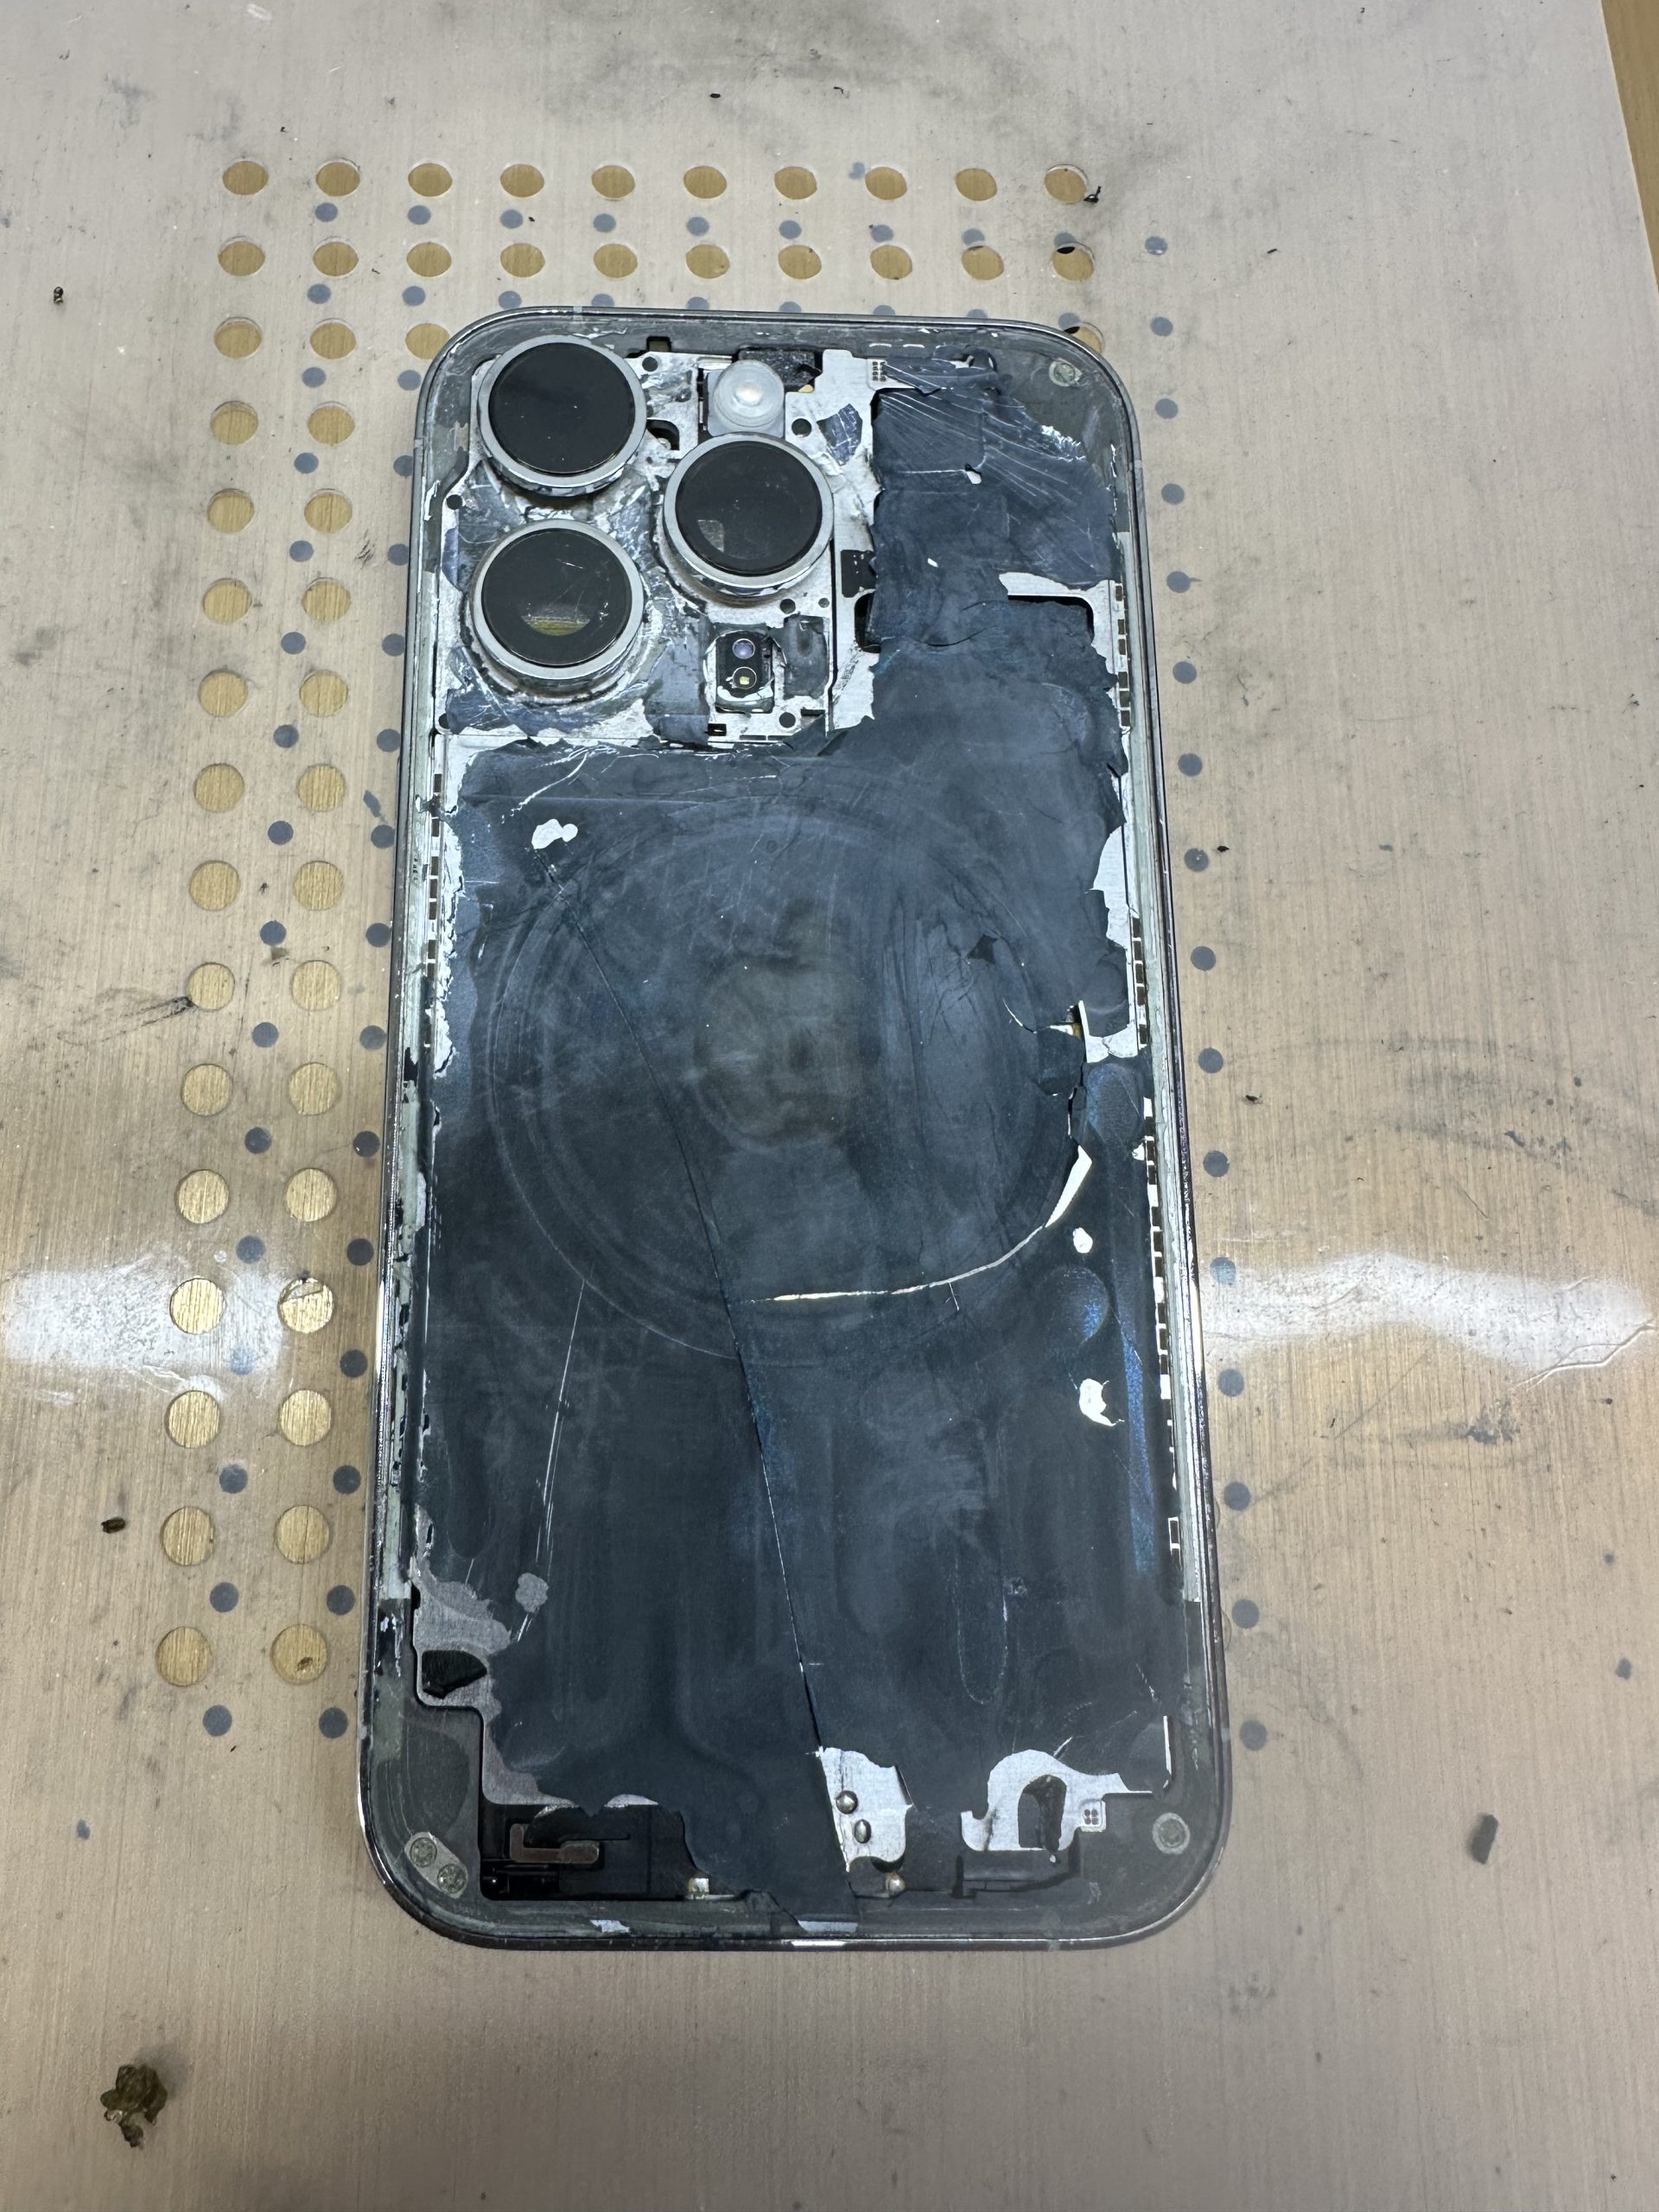
- Safety Disassembly: Remove camera, sensors, and motherboard for protection.
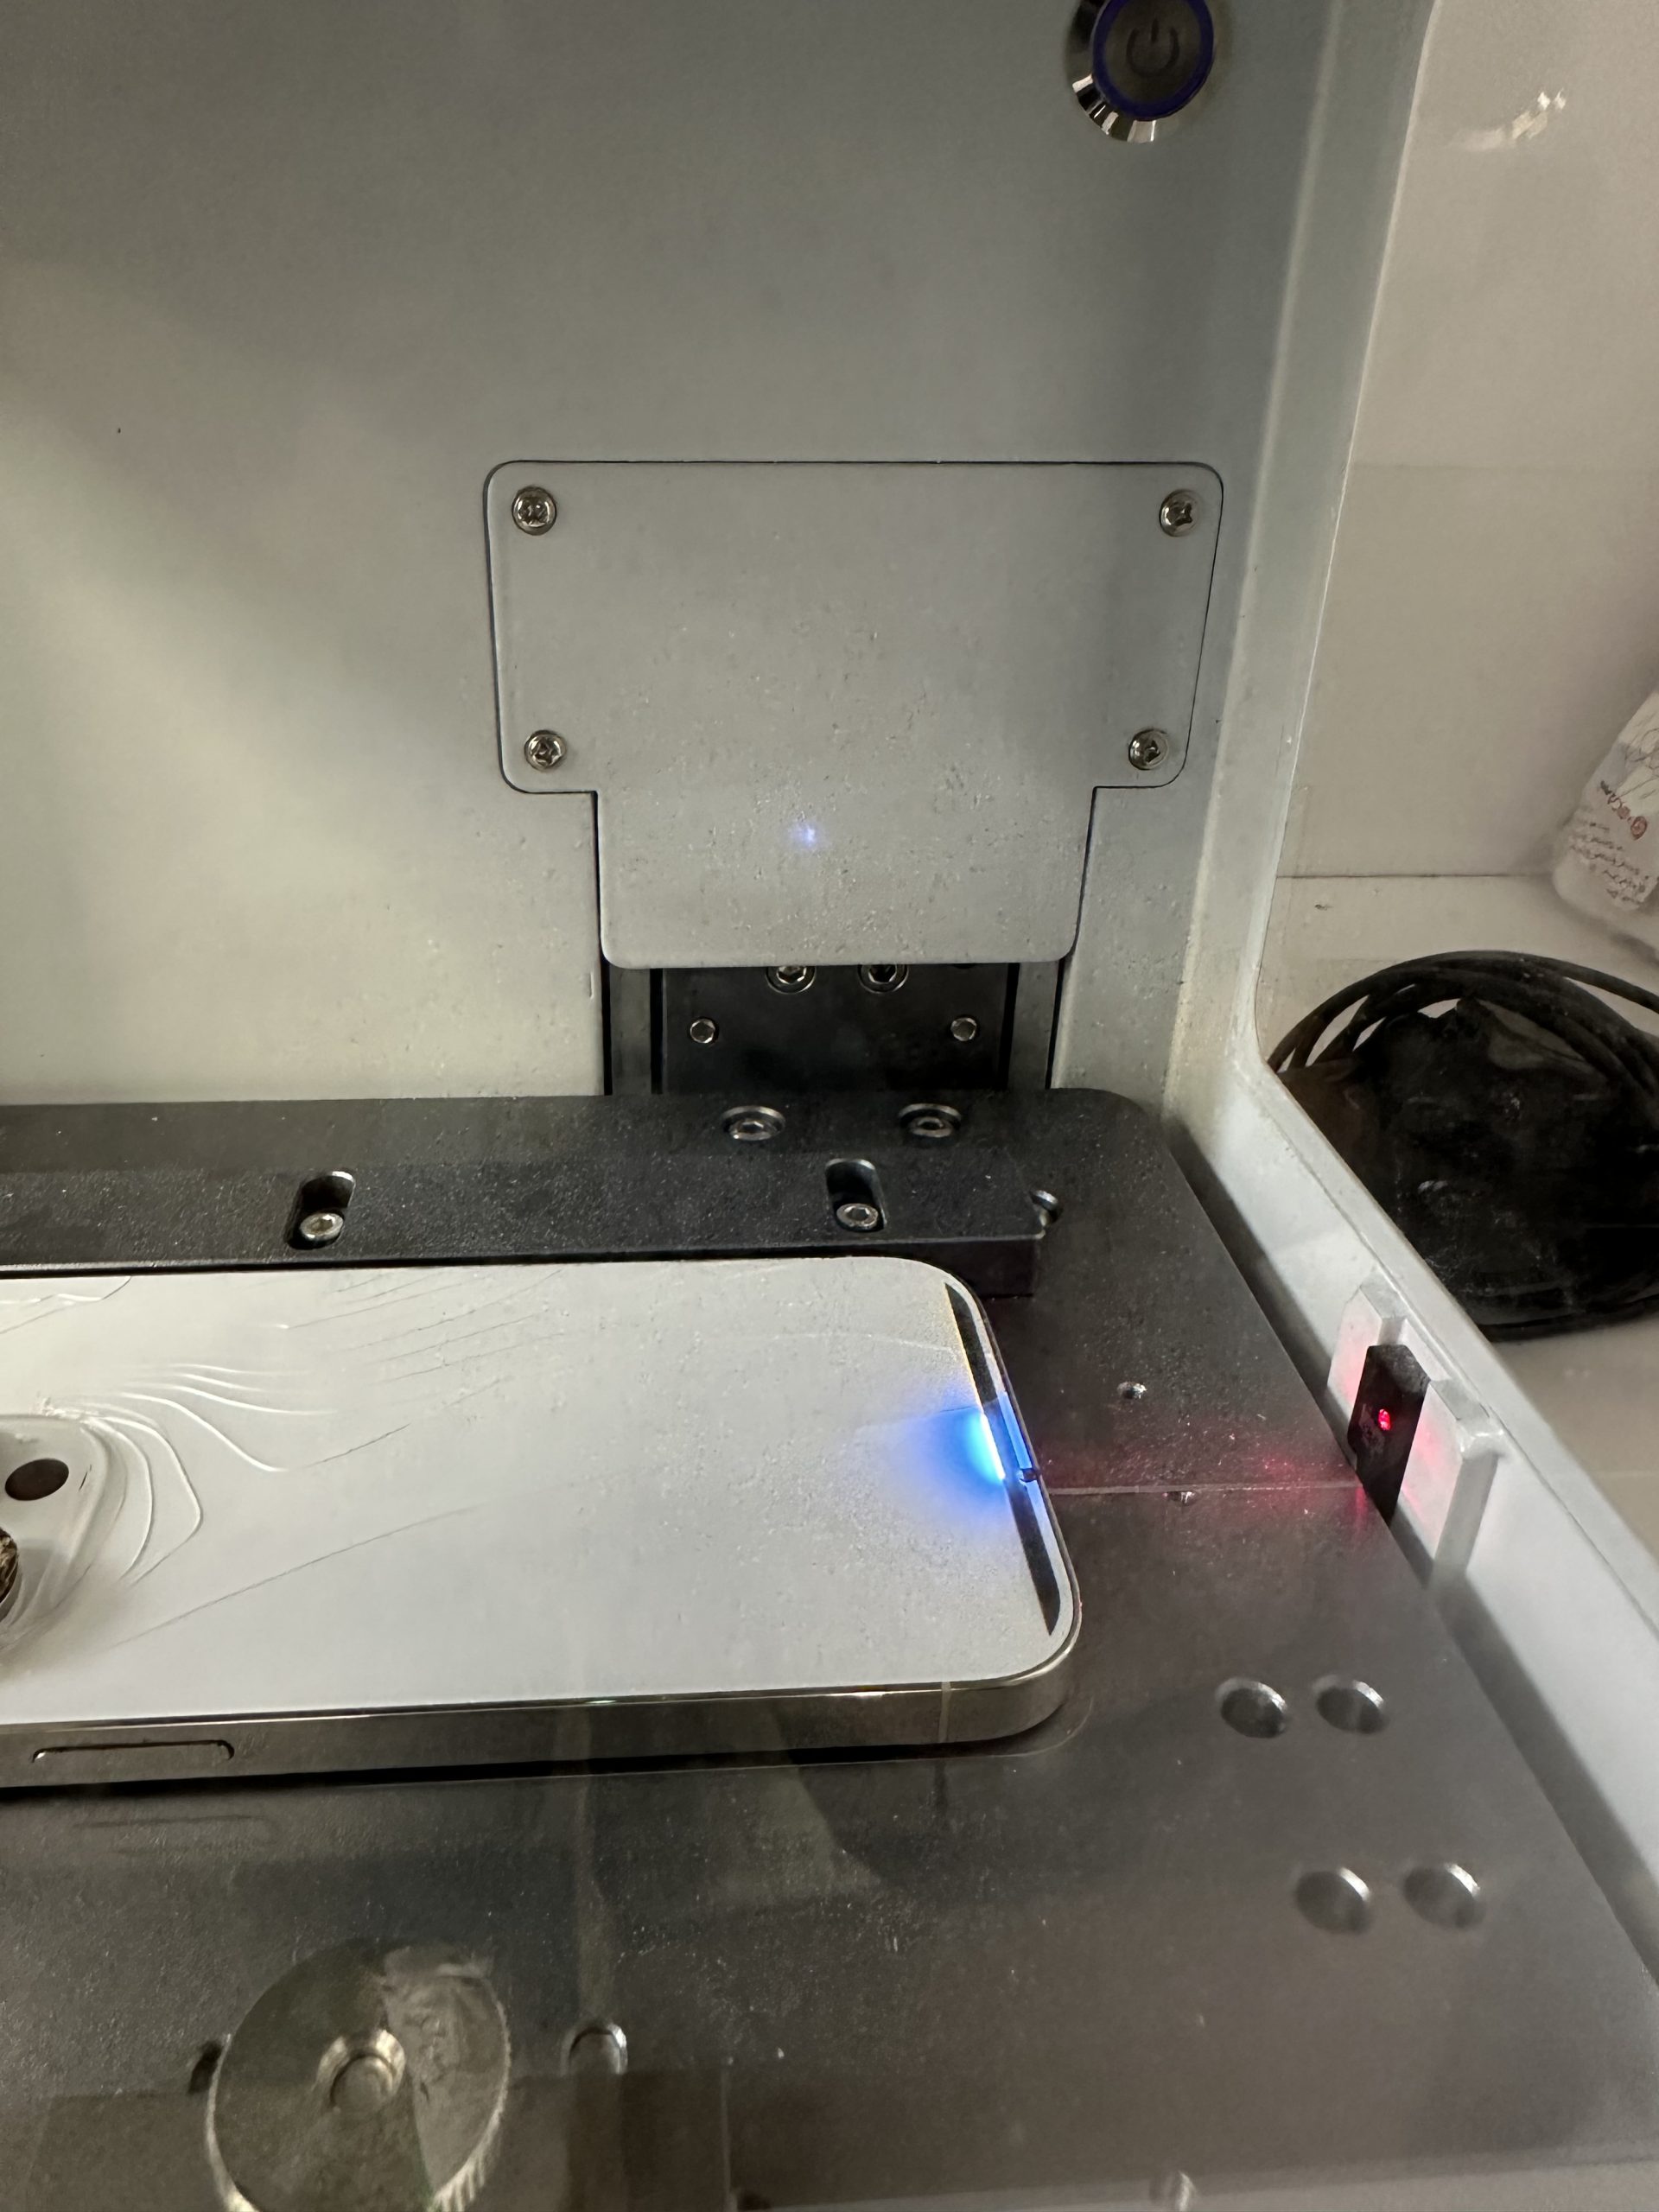
- Laser Process: Use a CO₂ laser to soften adhesive and prepare for glass removal.
- Cleanup: Remove all broken glass and clean the housing for new glass installation.
- Reassembly: Reinstall the camera, motherboard, sensors, battery, and screen.
- Final Testing: Test Face ID, wireless charging, camera, and waterproofing before handover.
Inside the Workshop: Real Repair Timeline
Why the Cost Makes Sense
Back glass is bonded to the frame over wireless charging coils and antennas with industrial adhesive.
The repair requires full disassembly, precision CO₂ laser equipment, careful cleanup, reassembly, and multi-point testing.
That time, tooling, and risk—not the price of glass—drives the bill.